Monday, October 29, 2007

Lemon rolls


I don't think anyone can guess what the above picture was suppose to be.

Well, it certainly didn't look like what it was suppose to be *sniff*. That was my first attempt at making lemon roll. I've tried making swiss rolls a few times before, and have never actually been successful with it. The texture of the cake is always good, but I always break the swiss roll itself when I try to roll it. Well, I found this new recipe online, and I decided to try it out, since it didn't seem to hard. Well, that was a wrong move as I overbaked the batter, and since the batter did not have any rising agent in it (eg baking powder), it didn't rise very well.

Hence, I decided to turn them into lemon biscuits! It actually tasted pretty good *shameless self praising*

Anyway, I decided to give the lemon roll another go, however I used a different recipe this time.


I am very happy with the result actually, as I can finally roll the cake into a lemon roll without breaking it! I actually adapted the lemon roll recipe from a vanilla roll, and added lemon zest and some lemon juice. The cream filling is basically just whipped cream flavored with lemon juice and a bit of caster sugar, with a few drops of yellow food coloring.


Sunday, October 28, 2007

"Healthier" Carbonara !?!


The reason I decided to make this so-called "Healthier Carbonara" was because I wanted to use up my basil. I was at Victoria Market on Friday, and spotted this little beautiful pot of Basil. I have been craving for some basil-ish dish for weeks, so I decided it was a good time to get some basil. After comparing the prices, I realized that the pot-basil and the bunch basil (no roots) are exactly the same price! I thought to myself "Ooh, I should buy the pot one, so I can eat basil any time I want!" So there I was, on a Friday afternoon, happily carrying my pot of basil home.

I am not very good with taking care of plants in general. My memories of my dead plants (primary school projects) still haunt me. With my bad experiences with plants, I took extra care and treated my pot of basil like a baby. I even asked my grocer how to take care of it. She said just put it next to my window and water it once every few days. The bag also said 'keep out of direct sunlight!', so I decided to keep my basil indoor. To my horror, the leaves started to shrivel yesterday! (Only one day after I bought it!) I was hoping it would get better today, but it looked even worse!

I couldn't let the poor basil die without contributing to the society right? So, this was what I decided to use the basil for, after looking up for recipes on taste.com.au

Healthier Carbonara (Adapted from Australian Good Taste - August 1997 , Page 30 )

330mls (1 1/3 cups) light evaporated milk
3 eggs
150g lean leg ham, cut into strips ( I didn't have ham, so I used chicken pieces)
500g Fettuccine
1/4 cup torn fresh basil leaves
Some button mushrooms
Garlic Powder
Ground black pepper
Sea salt for seasoning
A bit of olive oil
Extra fresh basil leaves, to garnish


Lightly whisk together the milk and eggs in a medium mixing bowl. In another heated pan with olive oil, stir fried chicken pieces with mushrooms until cooked. Season generously with garlic powder, sea salt and freshly cracked pepper.

Cook pasta in a large saucepan of salted boiling water, following packet directions, until al dente. Drain well and return to the sauce- pan. Add the egg mixture, the chicken and mushroom pieces, and stir constantly over medium-low heat until the egg mixture is almost set. Stir in the basil and season with pepper. Serve immediately, garnished with extra basil and sprinkled with pepper.


Anyone has any tips about how to revive my poor basil?

Tuesday, October 23, 2007

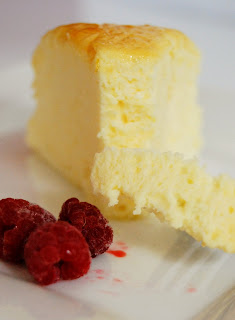
Light Japanese Souffle Cheesecake


I think my taste for desserts and cakes varies with my mood. Sometimes I prefer those rich and luscious chocolate cakes, fudgy brownies, but at the end of the day, I still prefer my desserts to be light. I love the texture of sponge cake, chiffon cake, and angel food cake! Maybe it's because they felt like pieces of cotton that just melts when you place them in your mouth. I think that these cakes are also harder to 'perfect', as you need more skills in folding the batter to prevent it from collapsing, hence making me appreciate them a lot more!

I was very happy with the result when I tried making the cake today because it did not collapse after I removed it from the oven. It also stayed moist and soft, unlike my experience of Japanese Cheesecake at Secret Garden, Bkk.


Japanese Souffle Cheesecake (Adapted from Maya's recipe)

125 g cream cheese
20 g butter
40 ml milk
3 egg yolks
40 g cake flour
1/4 tsp salt
1 tbs lemon juice
1/2 tsp grated lemon rind
3 egg whites
70 g caster sugar
1/4 tsp cream of tartar
1 tbs apricot jam

Preheat the Oven at 160 degrees. Melt the butter, cream cheese, and milk on a double boiler, leave to cool slightly. In a large bowl, beat together egg yolks, salt, lemon juice, lemon rind, and cake flour together until well mixed. In a separate clean bowl, beat the egg whites with cream of tartar until foamy. Slowly add in the sugar and continue beating until soft peaks form, and the mixture is glossy.

Slowly fold in the egg white batter into the egg yolk mixture, 1/3 at a time, until incorporated. Pour into an 8 inch springform tin and bake in a waterbath for 30-40 min or until cooked when inserted with a skewer. Remove from the mould immediately to prevent the cake from sinking. Mixed the apricot jam with a bit of water and warmed it in the microwave. Brush the apricot jam all over the top of the cheesecake to give it a glossy finish. Refrigerate after cooling.

I actually ate it before I put it in the refrigerator as it looks so irresistible! I love the cake as it wasn't too sweet and had a smooth and melt in the mouth texture. It was feathery light and I felt guilt-free eating it!


ps. sorry about the lighting in the photo. It's a bit blurry.

Monday, October 22, 2007

Brown Sugar Almond Biscotti


I've never actually had Biscotti before, even though a lot of times when I go to cafes, I see them sitting beautifully in a clear glass jar. They look so inviting, but I don't know why I've never actually thought about buying them before. Anyway, when I came across this super easy recipe in Donna Hay. (Yes, it's her again. By now, you guys can probably tell that she's my favorite celebrity chef). This recipe was so simple and convincing that I decided to try it out. The result? I love it! I'm so addicted to Biscotti now, even though I don't even know if this is a good version of it. But it's good enough for me! If there are actually better recipes out there, I don't think I want to know about it as I'd probably finish the whole batch at one go!

Brown Sugar Almond Biscotti From Donna Hay's Off The Shelf

2 cups plain flour, sifted
1 1/2 tsp baking powder
3/4 cup dark brown sugar
3/4 cup blanched whole almonds
2 eggs, lightly beaten
1 tsp vanilla extract

Preheat the oven to 160 degrees Celsius. Place the flour, baking powder, sugar and almonds in a bowl and mix to combine. Add the eggs and vanilla and mix well until a soft dough forms-this will take a while, as the dough needs to be worked so that it stays together.

Place the dough on a lightly floured surface and knead until smooth. Divide the sough into 2 logs and flatten slightly. Place the logs on a greased baking tray and bake for 30 minutes. Remove from the oven and allow to cool completely.

Slice the logs into 5 mm thick slices and place on a lined baking tray. Bake for 10-15 minutes or until the biscotti are crisp. Store in an airtight container and serve with espresso coffee for dunking or with ice-cream or a dessert. Makes 45

I think you are suppose to slice the log with a serrated knife, which I do not own, so I ended up breaking a few pieces of the biscotti. That wasn't a problem though, because they gave me a good excuse to pop them in my mouth (Ugly ones gets eaten :p ).

I personally really like the use of brown sugar as it gave the biscotti a beautiful golden color, and I assume it also add an extra touch to the taste as well.


Sunday, October 21, 2007

Pasta Al Fungi


This was a quick dinner I whipped up a few weeks ago. I decided to post about this instead of my dinner tonight, which was not very photogenic at all.

This was adapted from Donna Hay's Fettuccine Carbonara, I decided to add some garlic, and button mushrooms for an extra chew.

Pasta Al Fungi Adapted from Donna Hay's Modern Classics 1

400g fettuccine
300 g leg ham, cut into thin strips
2 clove garlic, minced
3 green onions, sliced
4 egg yolks
1/2 cup cream
1/2 cup finely grated Parmesan cheese
sea salt and cracked black pepper
2 tablespoons chopped flat-leaf parsley leaves

Cook the pasta in a large saucepan of salted boiling water until al dente. Drain and keep hot.
While pasta is cooking, heat a frying pan over medium heat. Cook the ham and green onions for 3-4 minutes until the ham is golden.

Place the egg yolks, cream, parmesan, salt and pepper in a bowl and whisk well to combine.
Toss the egg mixture through the hot pasta, coating it well, then toss with the bacon mixture and parsley and serve immediately. ( I didn't have fresh parsley so I had to use dried ones) Serves 4

Note: It's important to keep the pasta hot after draining it because the heat of the pasta actually 'cooks' the egg mixture, which will gradually thicken and coat the pasta.

A not-so-healthy, but comforting dish!

Saturday, October 20, 2007

Blueberry Cheesecake and Dinner @ Ants Bistro


After experimenting with making homemade Blueberry sauce yesterday, me and my friends decided to bake a Blueberry Cheesecake for another friend's Birthday. It was quite fun and tiring as it was the first time I bake with so many people. I think it was the first time baking things from scratch for them, so we joked and played around a lot. The cheesecake turned out quite well as everyone, especially the Birthday boy enjoyed it, so it was worth our energy!


For his birthday dinner, we decided to eat at Ant's Bistro as we couldn't really think of anywhere else. My friends have been here several times, and they loved their Braised Pork Knuckle and Minister Chicken. The atmosphere here is not bad too, as it was not as noisy as other Chinese restaurants. Here are some of the dishes we've ordered.


Garlic Spinach
This was a tad oily for my liking, but still tasted quite good. Some of my friends find it a bit bland though.


The Tea Leaf Smoked Duck
This was again, a bit oily. I found the duck a bit dry, but my friends seemed to enjoy it.


The famous Minister Chicken
We all agreed that this dish is good!


I forgot the name of this dish, and couldn't really identify what meat it was. My friend suspected that it was some sort of Chinese Pork nuggets. I didn't particularly enjoy since I found it a bit dry.


Scrambled Egg.
My friends ordered two of this! They seemed to love it! It was quite nice, but probably not something I would have ordered in a restaurant.


Braised Pork Knuckle
This was EXTREMELY sinful! The thick layer of the fat kept the braised meat moist and juicy. Also, as the fat was melted into the gravy, it makes the gravy really smooth and went very well with a bowl of hot steamed rice or steaming Mantou.

It seems like me and my friends have very different opinions about most of the dishes here as everyone has different taste. Well, the next time you can't decide on which restaurant to eat, do try out Ant Bistro and find out which dish you like!

Ants Bistro
9 Corrs Place, Melbourne
(03) 96392908

Friday, October 19, 2007

Mamon Cake With Homemade Blueberry Sauce


I was craving for some cake yesterday when I was blog surfing and my eyes came across Mamon cake in one of the Thai blog. I think Mamon cake is suppose to be a traditional Filipino sponge cake. The texture of the cake from the blog looks so light and fluffy, it reminds me of the Chiffon cake I love! I therefore decided to try it out, and as I'd expected, the cake turned out just the way I like it! The texture is moist and springy, great on its own! Since it was so light, I can actually eat it 'guilt-free', convincing myself that it's not at all fattening :p

I decided to spice things up a bit and added my homemade blueberry sauce, which was meant for my blueberry Cheesecake. The sponge cake absorbs the juiciness of the blueberry sauce very well. I will definitely make the Mamon cake again!


*edited*
This is for Steph:

Mamon Cake recipe by Khun Tri.

6 egg yolks
6 egg whites
1 cup cake flour
1 tsp baking powder
1/4 tsp salt
1/4 cup unsalted butter, melted
1/3 cup sugar (1)
1/2 cup sugar (2)
1 tsp vanilla
1/4 tsp cream of tar tar

*This was actually adapted by the owner by using the 'chiffon cake' method, instead of 'sponge cake' method, as she claims it works better.

Preheat the oven at 190 degrees Celsius or 170 fan forced. Beat the egg whites with cream of tar tar and sugar(1) until stiff peaks formed. In another bowl, beat egg yolks, sugar(2), and salt until the batter is creamy and thick. Carefully fold in flour and baking powder until well mixed, then add the vanilla.

Carefully fold in the egg yolk mixture into the egg white mixture (I did it the other way around) until well mixed. Be gentle, or else you'll deflate the egg whites. Add in butter, and fold until blended. Pour into 2 eight inch round cake tins that are lined with paper at the bottom. Bake until golden and the cake surface springs back when gently pressed. Remove the cake from the oven and cool in the tin.

Enjoy!

Tuesday, October 16, 2007

Dinner at Ghin Kao


I had dinner with my friends yesterday and we decided to try out this Thai restaurant called Ghin Khao after hearing some pretty good reviews from my Thai friends. Ghin Khao is located on Swanston Street near a photo studio. It has two levels and each has a different atmosphere. The lower for was busy and buzzling while the top floor seems classier and calmer. My friends were right, it was probably one of the most authentic Thai restaurant I've tried in Melbourne so far! We ordered Pad Thai, Red Duck Curry and Papaya Salad with Soft Shell Crab.


Pad Thai.
This was lovely! The best one I've had in Melbourne. The noodles were stir-fried very well and retains its chew, not soggy like other restaurants I've experienced. They should have used lime instead of the lemon though.


Som Tum Poonim or Thai Style Papaya Salad with Deep Fried Soft Shell Crab.
This was again, better than most restaurants I've tried here. It would be even better it was spicier. The deep fried soft shell crab adds a crispy touch to this dish! We also ordered some sticky rice to go with it. I love dipping my sticking rice in the Som Tum's sauce and let is soaks the spicy juicy goodness of the sauce, however, their sticky rice was a bit too mushy.


Gang Ped Phed Yang. Red Duck Curry.
This dish was served with a plate of rice. This was not bad, it has a hint of spiciness once it's down your throat. I still prefer the one at Ying Thai more.

The service here was quite efficient and the food arrived promptly! I'll definitely go back for more of their Authentic Pad Thai in the future!

Monday, October 15, 2007

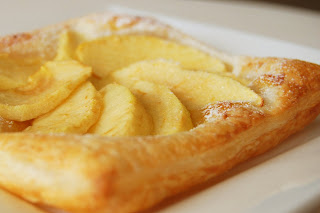
Continuing My Puff Pastry Fever With Apple Galette


Hope I haven't bored you guys with my Puff Pastry baking spree :) Well, just in case some of you were wondering what else you can do with puff pastry, why not try this easy Apple Galette?

All you need is one sheet of ready rolled puff pastry, some apricot jam, some ground almond, one granny-smith apple, and some caster sugar!

Cut the pastry into four squares and spread 1 teaspoon of apricot jam on each square leaving space on the border. Sprinkle the ground almond all over the jam and arrange the sliced apple pieces on top. Sprinkle some caster sugar on top, and baked in 220 degrees preheated oven until the pastry is puffed and golden. Sprinkled with more caster sugar and served warm with a scoop of vanilla ice-cream. Enjoy!


Saturday, October 13, 2007

Inside Out Chicken Pie


Have u ever had chicken pot pies and wish there were more of the pie pastry to munch on? I must admit that's always on my mind whenever we eat pot pies. Me and my siblings will always fight over the pastry part. This idea was inspired by Campbell's recipe book, but it uses buttermilk biscuit instead of puff pastry. I think this is a great idea as everyone can get the amount of pastry they want and the pastry stays crispy!

Inside Out Chicken Pie

Serves two

1-2 Sheet ready rolled Puff Pastry (as much as you want)
1 can Campbell's condensed chicken soup
Chicken Breast
minced garlic
Onion
Your choice of vegetables (you can also use frozen vegies)
Salt and Pepper to taste
some oregano and parsley

Cut one sheet of pastry into four squares. Cut each into four triangles, and stack one triangle on top of another, and press the edges with a fork to seal. You'll end up with 8 triangles. Bake them in a preheated oven at 220 degrees until puffy and golden.

Stir fried the garlic and onions until well browned, and add the diced chicken breast. After the chicken is cooked, add the vegies and stir in the Campbell soup. Add some water to your preferred consistency. Add oregano, parsley, salt and pepper to taste.

Put the chicken pie filling mixture on the plate and topped it with as many piece of puff pastry as you want. (I ended up eating four :p ) Enjoy!

Delicious Peanut Butter Chocolate Brownies


Another fantastic combination of Peanut Butter and Chocolate! Baking Bites really have lots of amazing recipes! Thanks again Nic! The brownies are great! Moist, and fudgy without being too rich!

Peanut Butter Chocolate Brownies (Adapted from Baking Bites)

1/4 cup butter, room temperature
1/2 cup chunky peanut butter
1 cup brown sugar
2 large eggs
1 tsp vanilla extract
1/3 cup plain flour
1/3 cup cocoa powder
1/4 tsp baking powder
1/4 tsp salt
1 cup chocolate chips

Preheat oven to 350F and line a 9×9-in square pan with baking paper, allow to overhang on the side for easy removal.
In a large bowl, cream together butter and peanut butter until smooth, then beat in sugar until light and fluffy. Add in eggs one at a time, followed by the vanilla.
In a small bowl, sift together cocoa, flour, salt and baking powder. Mix in to peanut butter mixture at a low speed, stopping when just combined. Stir in chocolate chips and scrape batter into pan, spreading into an even layer.
Bake for 26-29 minutes, until set. Edges should feel slightly firm and the center should not look wet or jiggly. Be careful not to overbake!
Cool on a wire rack and lift brownies out with the mould when ready to slice.
Makes 16 brownies.


Thursday, October 11, 2007

Super Easy Banana Puff


I saw a leftover banana in my pantry this afternoon, and was deciding what to do with it. Since there was only one left, it was not enough to make any kind of cake, muffins, or banana bread. I was craving for some banana fritter, but then I can't be bother to do the deep-frying, just for one banana. Then an idea came up, I can make banana puff!

This is so fast and easy, and the results are satisfying! I basically take out one sheet of puff pastry from the fridge, and let it thaw. I then cut the puff pastry into 4 squares, quartered the banana, and lay them on the puff pastry squares. I fold the sheets in half over the banana, and press the edges with a fork. Sprinkle them with some caster sugar, and popped them into a preheated oven at 200 degrees fan-forced until they are puffy and golden! And voila~~a banana puff is born!

You can eat them warm, sprinkled with more caster sugar or maple syrup. How I wish I had vanilla ice cream at home!


Wednesday, October 10, 2007

Dinner @ Thai Taste


The first time I've had Thai Taste was about three years ago, but I don't usually go there as there were no trams that could get us there directly. But I've got smarter this year, and thanks to Metlink, I realized there are buses that take you straight there! So convenient!


Anyway, Thai Taste is situated on 92 Johnston St. Collingwood. It's an authentic Thai restaurant that serves pretty good Thai food. The service is also pretty good with a nice ambiance. The were two types of seats available, the normal table or you can choose to sit on the floor like the traditional Thai way.


Thai Style Tempura Morning Glory Salad
This was one of my favorite. I think I have a weakness for deep-fried food.


Special Thai Papaya Salad with noodles
I didn't particularly like this dish but my friends liked it.


Deep Fried Pork Shank
This is pretty good! Probably their recommended dish as I don't really see this dish in other restaurants. The sauce on the side was lovely.


Red Duck Curry
I'm quite disappointed it this dish. It was overly sweet. I much prefer the one at Ying Thai.


Pad Thai
I usually love Pad Thai, but the one here has way too much bean sprouts and vegies, there weren't enough noodles.


Stir-Fried Chinese Broccoli and Crispy Pork
This dish was done quite well, both the vegetable and pork remained crispy and crunchy!


They even have a live band playing! But it's quite funny to see a Caucasian guy singing English songs in a Thai restaurant. But I must admit he has pretty good vocal!

Overall, this was one of the more authentic Thai restaurants in Melbourne. I would go back again, but will probably stay away from their Pad Thai and Red curry. I think the next time I go back, I'll probably try their steamed fish with lime sauce as it looks scrumptious when I saw it on other customers' tables on my way out.

Tuesday, October 9, 2007

Lemon and Sugar Crepe


I tried to make some crepes in an attempt to recreate the crepe cake I had here. But I realized the crepes' texture were too too thick for the crepe cake, and won't be able cut through with ease with a fork like the one I had at Secret Garden. The crepes were good on their own though, so I gave up the idea of the crepe cake and decided to eat them with lemon and sugar instead. They were also great with Nutella and banana!

Crepes (From Donna Hay Modern Classics 2)

Sift 2 cups plain flour into a bowl and add 2 tablespoons caster sugar. Combine 4 eggs, 1 2/3 cups milk and 3/4 cup cream, and slowly whisk into the flour until smooth. Allow to stand for 20 minutes. Cook the crepes in a small non-stick frying pan over medium heat until light golden on each side. Serve warm. Makes 20.


Sunday, October 7, 2007

My Very Own Homemade Eggs Benedict!


Yay! I was so excited when I woke up today as I planned to make Eggs Benedict for me and my brother. I had prepared most of the ingredients last night (eg. chilling the eggs). I'm quite happy to say that it's successful + so economical!

Ok, I must admit that I cheated *evil grin*. I didn't make my own Hollandaise sauce, instead I use the store-bought 'Maille' one. I didn't want to have a heart-attack from seeing all the egg yolks and butter that is required to make the real Hollandaise. I also decided to save me all the hassle from buying the lemon etc., and just eat the 'innocent looking' creamy sauce from the bottle instead. It's not bad at all for a store-bought sauce. (Please don't send a cat to hunt me down if you tried and hated the sauce)

Anyway, it was quite a task trying to poached 4 eggs, fried the ham, and toast the English muffins, all at the same time. I feel so proud though, after they are all done and assembled. I topped them with the warmed Hollandaise sauce.


Before


After. Checkout that delicious runny yolk! Yum!

I'm very happy with the results! (Though I think my eggs are a bit overcooked). Now I can say that I can poach eggs! Thanks to this video! My only task left for the future is to try and make my own Hollandaise sauce, but I'll definitely need a lot of exercise before that!

Saturday, October 6, 2007

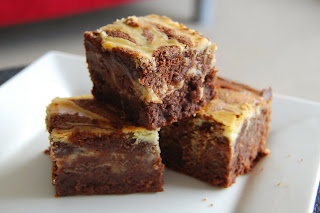
Sinful Cheesecake Brownies


A lot of my friends have never heard of Cheesecake brownies, and they seemed to frown when I mention it. Anyway, this is the first time I made cheesecake brownies as I saw the recipe from the September issue of Australian good taste. Apparently, it was an old recipe but it was so good that they have to republish it again! I must say I'm glad I made it! It was sooo good and addictive! The texture of the brownies were rich, moist and fudgy! If you are a chocolate lover, this IS a MUST TRY! However, if you are not, you might find these too rich for your taste.

Cheesecake Brownies
  • Melted butter, to grease
  • 150g butter, chopped
  • 300g good-quality dark cooking chocolate, chopped
  • 3 eggs
  • 215g (1 cup) caster sugar
  • 225g (1 1/2 cups) plain flour
  • 65g (1/4 cup) sour cream
  • 1 x 250g pkt cream cheese, at room temperature
  1. Preheat oven to 180°C. Brush a square 20cm (base measurement) cake pan with melted butter to lightly grease. Line the base and 2 opposite sides with non-stick baking paper, allowing it to overhang.
  2. Combine the butter and chocolate in a saucepan over low heat. Cook, stirring, for 5 minutes or until chocolate melts and mixture is smooth. Remove from heat. Set aside for 5 minutes to cool.
  3. Whisk 2 of the eggs in a small bowl. Add whisked eggs and 140g (2/3 cup) of the sugar to the chocolate mixture, and stir to combine. Add the flour and sour cream and stir until well combined.
  4. Use an electric beater to beat the cream cheese and remaining sugar in a bowl until smooth. Add the remaining egg and beat until just combined.
  5. Spoon chocolate and cream cheese mixtures, alternately, over base of pan. (I put the brownies layer in the bottom and the cream cheese layer on top instead). Use a skewer to swirl to create a marble effect. Bake in oven for 30 minutes or until a skewer inserted into the centre comes out clean. Set aside in the pan for 1 hour to cool. Cut into squares to serve.
Australian Good Taste - July 2005 , Page 73
Recipe by Sarah Hobbs


My swirling skills are not very good as you can see here, but they still tasted awesome!